Baked Alaska Recipe – A Retro Dessert
In the 1980s I was newly married and enjoyed inviting friends round to dinner. I liked to try out new recipes and dishes to impress and delight my guests. So one day I decided to try making Baked Alaska. I was amazed at how easy it is to do – but you do have to be precise.
Baked Alaska may be an icon of the 1970s but try making it for your guests or family – they will love it – and it really is easy to make!
What Is Baked Alaska?
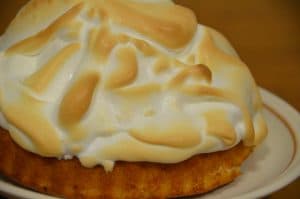
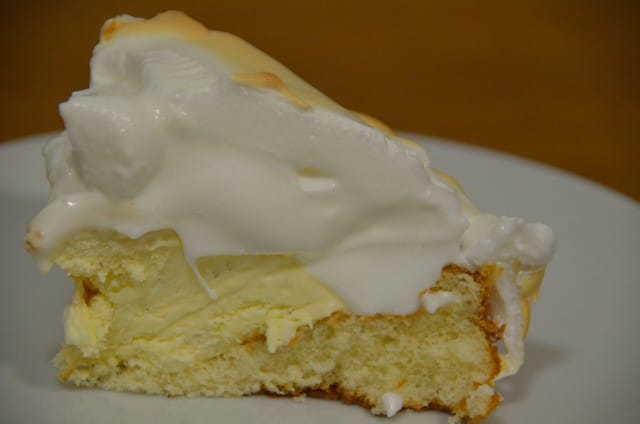
In case you don’t know Baked Alaska is ice cream covered in meringue which is baked in the oven. The outside of the meringue goes brown and is warm, while the ice cream remains frozen.
Without fail, guests love it, even if they have made it themselves before, as it always seems exciting to take an ice cream dish out of the oven!
The amazing thing is that it is really easy to do. The worst that can happen (as happened once) is that it all collapses. Even so – it still tastes nice! I hadn’t made it for ages, and just recently decided to try it again. It is very delicious, impressive and surprisingly light (but very sweet!).
So here is my Baked Alaska recipe. Sure enough it turned out as delicious as ever!
Planning Ahead
You need to plan ahead. You need to shape and freeze the ice cream at least two hours before you need it. You can also separate the eggs and put the egg whites in the fridge ready to whisk.
When you separate the eggs, ensure there is no grease in the bowl, and that there is not even a spec of egg yolk in the white.
You can separate eggs by breaking the egg, then passing the yolk from one side to the other while letting the white fall down into a bowl below.The yolk is then put in another bowl.
You can get a special egg separator device, which can make the process easier.
Key To A Successful Baked Alaska Dessert
The key is to get the ice cream as cold as you can – by shaping it and wrapping it in foil in the freezer – and ensuring that your meringue is good and stiff and then covers every last millimetre of the ice cream. Any small gaps, even pin head size, can let heat in.
Getting complete coverage is not difficult to do, as the meringue is thick. It is most important to check around the bottom of the dessert, where the meringue meets the sponge, for any sneaky gaps.
The oven needs to be really hot – 200 degrees C and preheated so it has the minimum time possible in the oven – about 4 minutes. It then needs to be served immediately.
Of course, Baked Alaska is a good recipe to use up egg whites if you have used egg yolks in something such as real custard.
How Does Baked Alaska Work?
The egg white is whipped up to incorporate lots of air. The small pockets of air in the meringue act as insulation to prevent the heat penetrating through to the ice cream – as air is a poor conductor of heat. It is a great way to demonstrate this science to children!!
When Was Baked Alaska Invented?
It appears that Baked Alaska, perhaps not surprisingly, originated in 1876 to celebrate the acquisition of Alaska. It was first created at Delmonico’s Restaurant in New York. It grew in popularity in the UK in the 1970s and 1980s and may be regarded as part of the same ‘retro’ food along with prawn cocktail, steak and chops and black forest gateau. Is it still served in restaurants?
Some Baked Alaska recipes suggest using up to six egg whites, but I found that using three whites provides plenty of meringue to cover about 500ml of ice cream. This will serve 4-6 people. I used a medium sponge base, but you could use a sponge cake base, using half a Victoria Sponge Cake or even a Chocolate Sponge Cake
Baked Alaska Recipe

Serves 4-6
Ingredients
- 500ml vanilla ice cream
- 1 medium sponge base
- 3 egg whites
- 125g / 4oz caster sugar
Cooking Directions
- Shape the ice cream into a mound that will fit well within the edges of the sponge base
- Wrap in foil and freeze for for at least two hours
- Once the ice cream is ready
- Preheat the oven to 220 degrees C
- Whisk the egg whites until they form stiff peaks
- Add the sugar a little at a time and continue whisking
- The meringue should be smooth, stiff and shiny
- Place the sponge on an oven proof dish
- Unwrap the ice cream and place it on the sponge
- Spread the meringue over the ice cream, taking care to ensure the the whole of the ice cream is completely covered, with no gaps anywhere
- Check the oven is up to temperature
- Place in the oven and time 4 minute – watching it all the time (it’s great watching it turn from white to brown
- Be ready to take it out of the oven as soon as it is ready
- Serve immediately!


I remember these well. I also remember an even nicer way of serving a similar dish. I was served these in a Spanish restaurant and I think they were called Peña Santa. It was just like baked alaska but they were small individual ones. At the table, some spirit was poured over them and set alight. Lovely.
I used to make this a lot in the 70’s too, my recipe used a sliced swiss roll as the base in the upturned flat lid of a rectangular casserole dish , this was topped with tinned fruit, peaches or pineapple , pears they’re all OK, then the block of ice cream and the meringue.. Might make it again when the weather warms up (too cold for ice cream as it’s winter in Aus)